Okta mTLS: How To Configure And Troubleshoot Device Trust

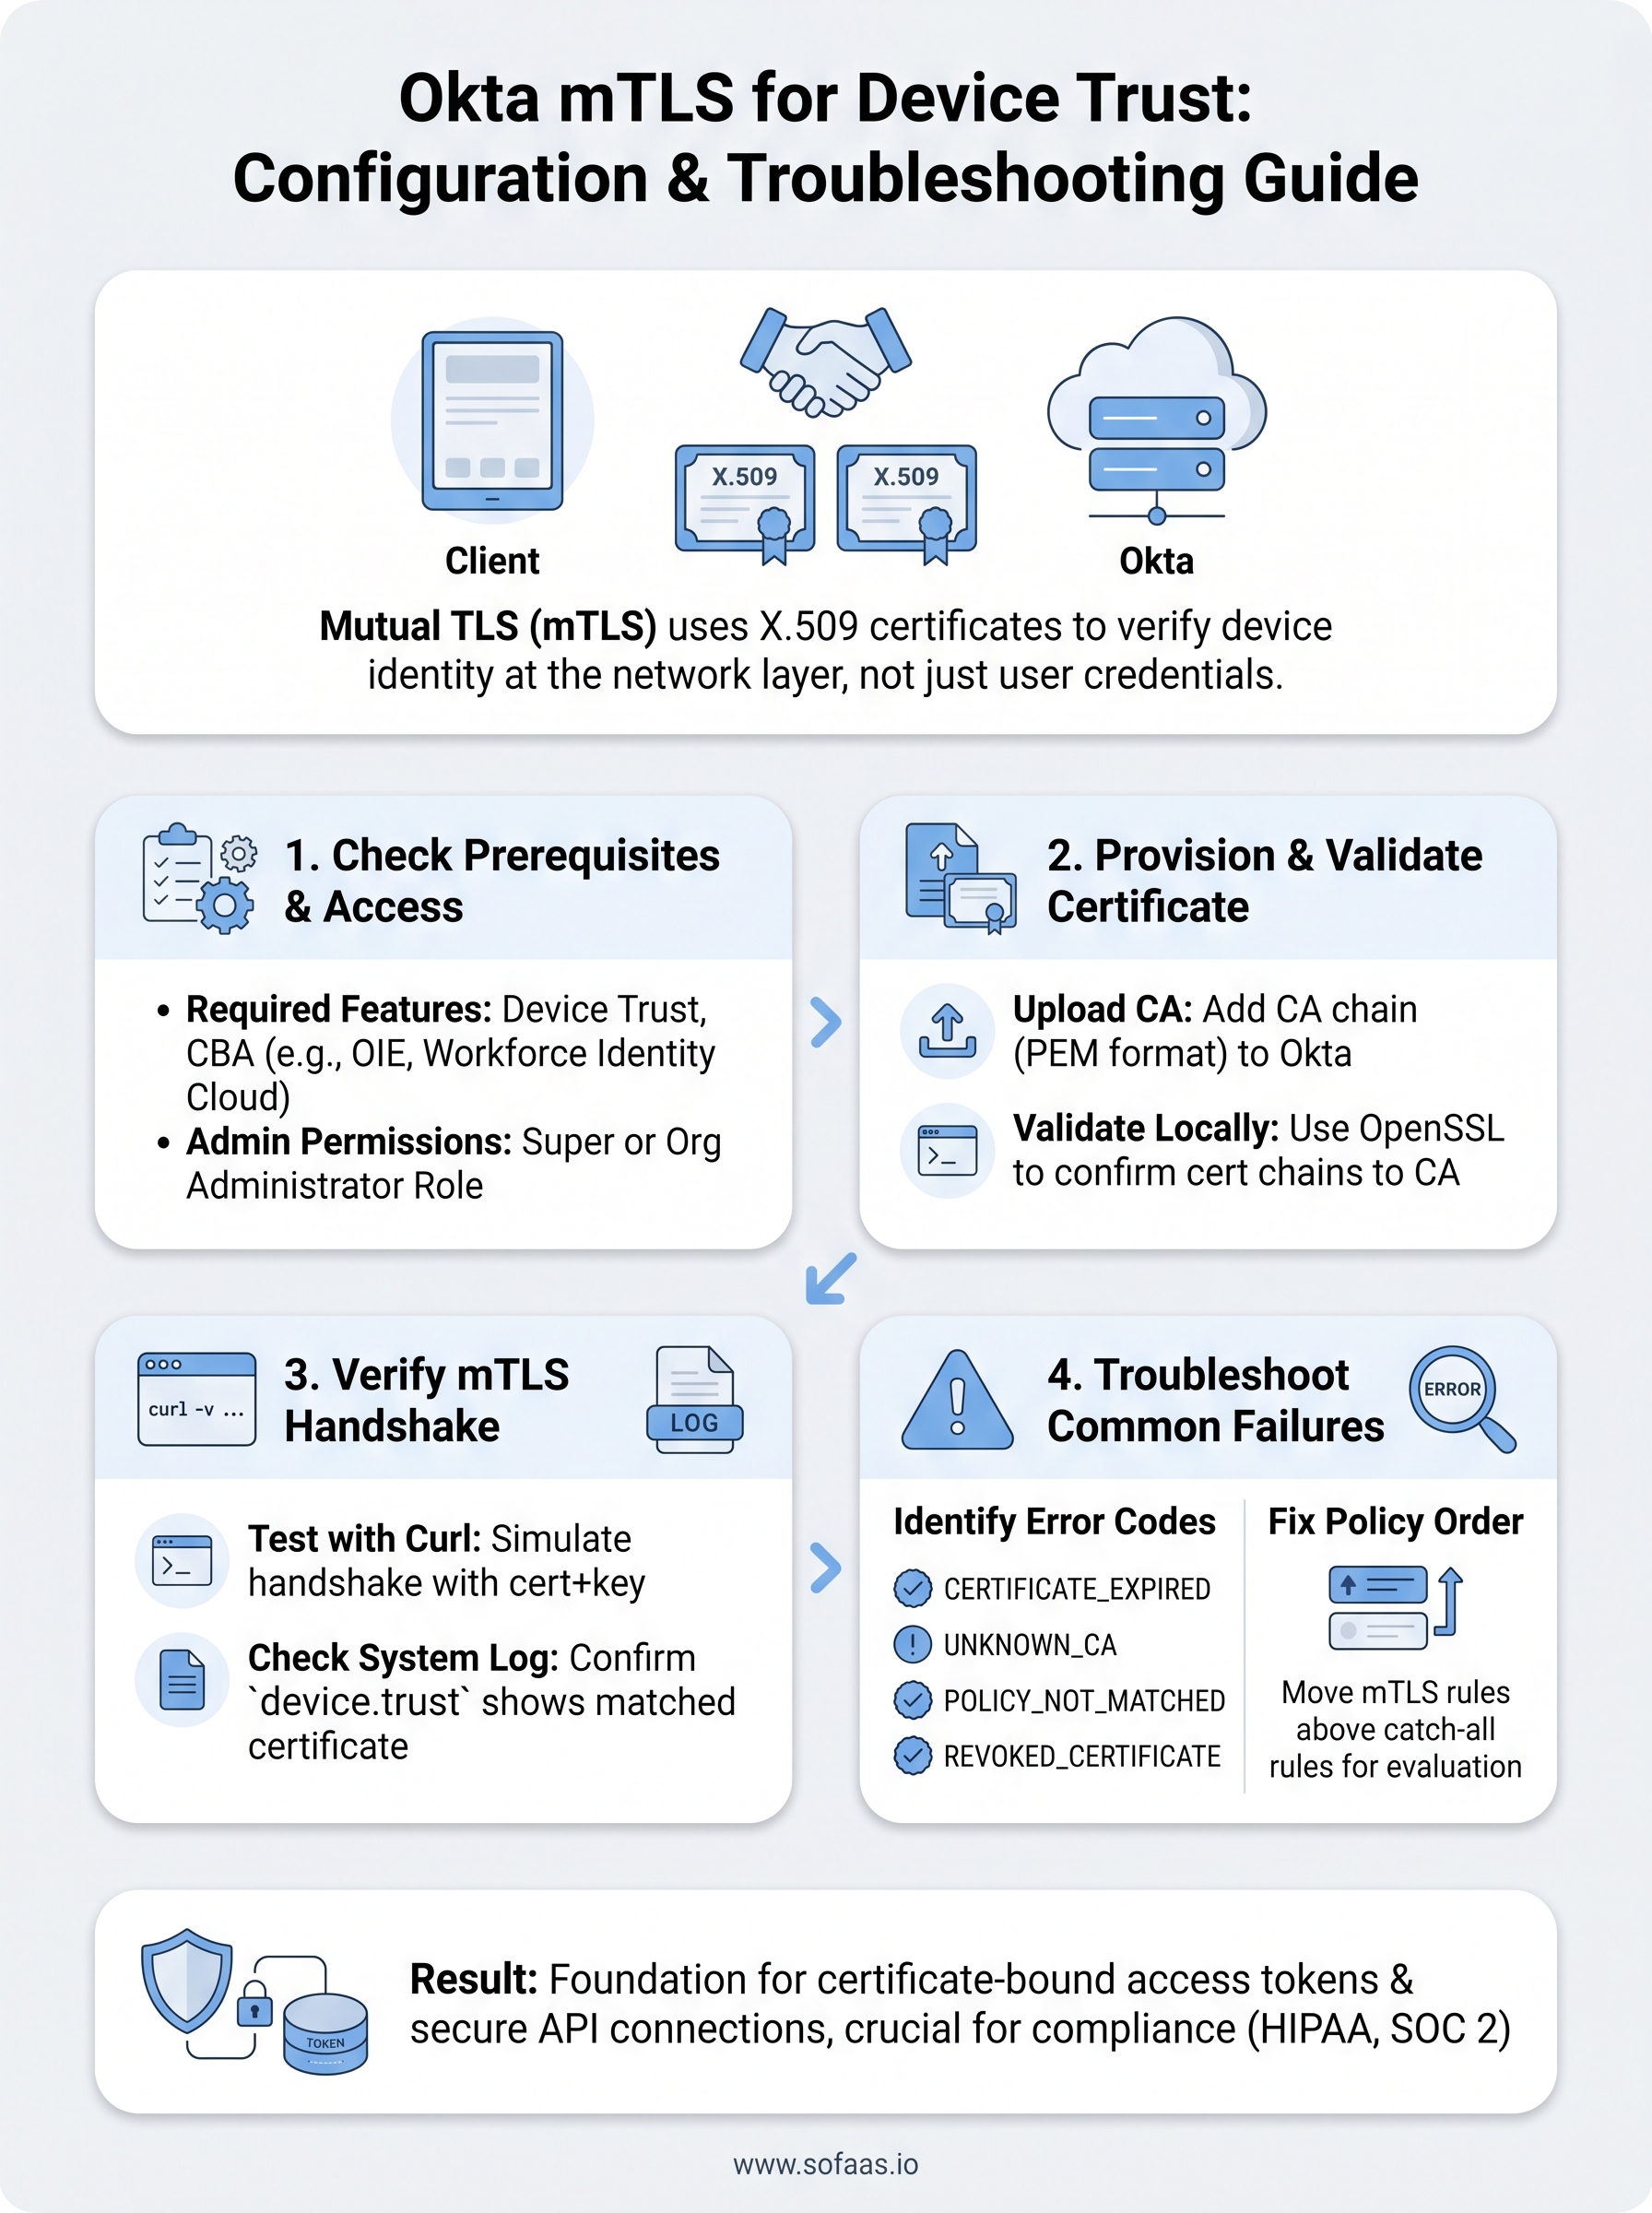
Mutual TLS adds a critical layer of security by requiring both the client and server to authenticate each other through certificates, and when you configure Okta mTLS, you're applying that principle directly to device trust and token security across your organization. It's a powerful mechanism, but getting it right involves navigating certificate chains, policy configurations, and troubleshooting steps that aren't always straightforward.
For teams building healthcare applications, mTLS isn't optional thinking, it's foundational. Securing API connections between apps and EHR systems demands verified device identity and airtight token handling. That's exactly why we built SoFaaS™: to abstract away the complexity of healthcare integration infrastructure, including the security and compliance layers (HIPAA, SOC 2 Type II) that technologies like mTLS support. We deal with these authentication challenges daily so our customers don't have to.
This guide walks you through how to configure mTLS in Okta for device trust, secure your API connections in Okta Workflows, and strengthen token security with certificate-bound access tokens. You'll also find practical steps for troubleshooting common issues, from certificate validation failures to policy misconfigurations, so you can resolve problems quickly and keep your environment locked down.
How Okta mTLS works for Device Trust
Okta mTLS operates on a straightforward principle: both the client device and the Okta server exchange X.509 certificates during the TLS handshake, so authentication is mutual rather than one-sided. Instead of relying solely on a username and password or a bearer token, the connection itself becomes the proof of identity. This matters for device trust because it ties authentication to a specific, verifiable machine, not just a credential that could be stolen or replicated.
The certificate handshake process
When a device initiates a connection to Okta, the standard TLS handshake extends to include a client certificate request from the server. Your device responds by presenting its certificate, which Okta then validates against a configured Certificate Authority (CA). If the certificate is valid, not expired, and chains up to a trusted root, the handshake succeeds and the connection proceeds. If anything fails, including a revoked certificate or an untrusted issuer, Okta rejects the connection before any authentication logic even runs.

The mTLS handshake happens at the network layer, which means it enforces device identity before Okta processes any credentials or policy rules.
This sequence makes the mechanism robust. The device must hold a private key that corresponds to the certificate's public key, and that private key never leaves the device. An attacker who intercepts the certificate alone cannot impersonate the device because they lack the matching private key to complete the handshake.
How Device Trust policies use mTLS signals
Once Okta confirms the mTLS handshake, it exposes the device certificate attributes (such as the certificate serial number, subject DN, and issuer) to your policy engine. You can then write sign-on policies that require a successful mTLS handshake as a condition before granting access to sensitive applications. This is the core of Device Trust: Okta knows the request came from a machine holding a certificate your organization issued, not just a browser with valid credentials.
Your policies can also combine mTLS with other signals. For example, you can require that a device passes the mTLS certificate check and that the user belongs to a specific group before granting access to a high-privilege application. This layered approach means that compromising a single factor, whether a password or a device certificate, is not enough to gain access. The combination of signals is what makes device trust meaningful in practice rather than just procedural.
Step 1. Check prerequisites and access in Okta
Before you configure Okta mTLS for device trust, you need to confirm that your tenant has the right features enabled and that your account has the administrative permissions required to manage certificates and policies. Skipping this check leads to confusing errors later in the process, so spend a few minutes here before touching any certificate settings.
Required Okta features and licensing
Your Okta tenant must have Device Trust and Certificate-Based Authentication (CBA) available. These features are tied to specific Okta product editions, and not every plan includes them by default. Check your current plan against the table below to confirm you have access before proceeding.
| Feature | Required Okta Edition |
|---|---|
| Device Trust | Okta Identity Engine (OIE) |
| Certificate Authority upload | Workforce Identity Cloud |
| mTLS for API access (Workflows) | Okta Workflows + Advanced API Access Management |
| Certificate-bound tokens | Identity Engine + API Access Management |
If your tenant runs on Okta Classic Engine rather than Identity Engine, you will need to migrate before mTLS device trust policies are available to you.
Contact your Okta account representative if your edition does not include these features. Do not attempt to configure CA certificates or device policies on a plan that lacks the underlying capability, as the relevant settings simply will not appear in your admin console.
Admin permissions you need
You need Super Administrator or Org Administrator access to upload Certificate Authority files and configure sign-on policies in Okta. Navigate to your admin console, then go to Security > Administrators and verify your assigned role. If you only have Application Administrator or Help Desk Administrator access, request an elevation before continuing, as those roles block access to the certificate management screens entirely.
Step 2. Provision and validate the client certificate
With your prerequisites confirmed, you can move on to provisioning the client certificate and uploading your Certificate Authority (CA) to Okta. This step establishes the trust anchor that Okta uses to validate every device certificate it receives during an mTLS handshake.
Upload your CA certificate to Okta
In your Okta admin console, navigate to Security > Identity Providers and select the option to add a new Identity Provider of type "Smart Card or X.509 Certificate." You will see a field to upload your CA certificate in PEM format. If your CA chain includes an intermediate certificate, concatenate the intermediate and root PEM files into a single file before uploading, with the intermediate certificate appearing first.
Okta validates the full chain during upload, so if your concatenated PEM file is malformed or out of order, the upload will fail with a generic certificate error rather than a descriptive message.
Once uploaded, Okta displays the issuer distinguished name (DN) and expiry date for your CA. Confirm both match what you expect before saving. A common mistake is uploading a root CA when the device certificates are actually issued by an intermediate, which causes every handshake to fail validation.
Validate the certificate chain locally before testing in Okta
Before sending a device certificate through Okta mTLS for the first time, verify the chain locally using OpenSSL. Run the command below to confirm your client certificate chains up to your uploaded CA:
openssl verify -CAfile ca-chain.pem client-cert.pem
A successful response returns client-cert.pem: OK. If you see a verification failure, the output identifies the specific problem, such as an expired intermediate or a missing issuer, giving you a precise fix rather than a vague handshake error in Okta's logs.
Step 3. Verify the mTLS handshake end to end
After uploading your CA and provisioning the client certificate, you need to confirm that Okta mTLS is actually working before you lock down any production policies. Verification at this stage catches configuration gaps, such as a mismatched certificate or an incorrect policy binding, while they are still easy to fix rather than after users start hitting access errors.
Test the handshake with a curl command
The fastest way to verify the mTLS handshake is to simulate it from the command line using curl with your client certificate and private key. This isolates the network layer and confirms Okta accepts your certificate before you involve browser behavior or policy rules.
Run the command below, replacing the placeholders with your actual Okta domain, client certificate path, and private key path:
curl -v \
  --cert client-cert.pem \
  --key client-key.pem \
  --cacert ca-chain.pem \
  https://your-org.okta.com/oauth2/v1/token
A successful handshake produces a TLS connection log showing the server certificate exchange, followed by an HTTP response from Okta's token endpoint. If the handshake fails, curl outputs a specific TLS alert code, such as alert unknown ca or certificate verify failed, which tells you exactly where the chain breaks.
A
certificate verify failederror at this stage almost always means the CA file you uploaded to Okta does not match the issuer on your client certificate.
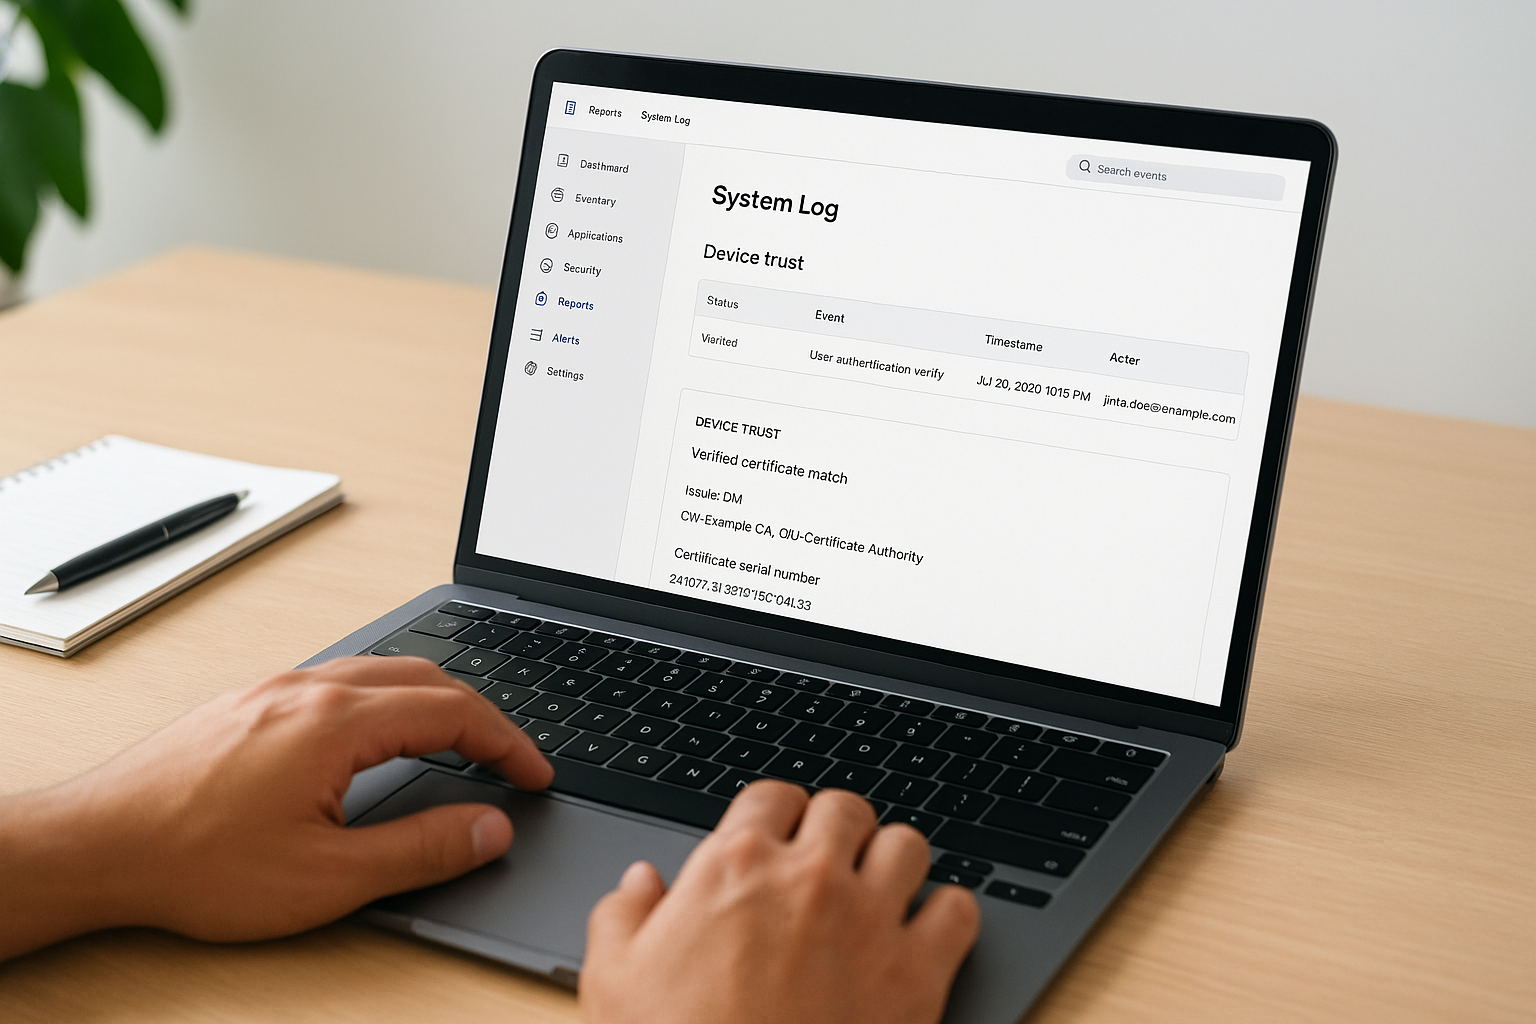
Confirm device trust in Okta System Log
Once the curl test succeeds, trigger a real authentication attempt from a managed device and then review the Okta System Log for the corresponding event. Navigate to Reports > System Log in your admin console and filter by event type user.authentication.verify. Look at the event detail and confirm that the device.trust context shows a verified certificate match, including the correct issuer DN and certificate serial number you expect. This confirms that Okta processed the mTLS signal and applied it to your policy evaluation, not just that the network connection succeeded.
Step 4. Troubleshoot common Device Trust failures
Even after a successful handshake test, Device Trust failures can surface in production for reasons that are distinct from the mTLS certificate chain itself. The most reliable troubleshooting approach is to isolate the layer where the failure occurs, whether that is certificate validation, policy evaluation, or token binding, before making any configuration changes.
Identify the failure layer using System Log error codes
The Okta System Log is your first stop whenever a Device Trust check fails. Each failed authentication event includes an error code and a context block that tells you precisely where Okta rejected the request. The table below maps the most common okta mTLS failure codes to their root causes and fixes.
| Error Code | Root Cause | Fix |
|---|---|---|
CERTIFICATE_EXPIRED |
Client certificate has passed its validity date | Re-issue the client certificate from your CA |
UNKNOWN_CA |
Issuer not in Okta's trusted CA list | Upload the correct intermediate or root CA PEM |
POLICY_NOT_MATCHED |
Sign-on policy condition not evaluating mTLS signal | Review policy rule order and certificate attribute binding |
REVOKED_CERTIFICATE |
Certificate appears on your CRL or OCSP | Confirm the CRL distribution point URL is reachable from Okta |
If you see
UNKNOWN_CAafter already uploading your CA, check whether your device certificates are issued by an intermediate that is missing from the uploaded chain.
Fix policy evaluation order problems
When your certificate validates successfully but access is still denied, the problem is almost always policy rule ordering. Okta evaluates sign-on policy rules from top to bottom and applies the first matching rule, so a broader rule placed above your mTLS-specific rule can intercept the request before device trust is evaluated.
Move your mTLS rule above any catch-all rules in the policy stack, then re-test with a fresh authentication attempt from your managed device. Confirm in the System Log event detail that the rule name shown in the policyEvaluationDetail field matches the mTLS rule you intended to trigger, not a fallback rule that bypasses the certificate check.
Next steps
You now have a complete picture of how Okta mTLS works for device trust, from uploading your CA certificate and validating the handshake to diagnosing policy evaluation failures in the System Log. The steps in this guide give you a repeatable process you can apply to any managed device rollout or API security configuration in your Okta environment.
Security at the authentication layer is only one piece of the puzzle for healthcare applications. If your team is also working through the challenge of connecting apps to EHR systems like Epic or Cerner while maintaining HIPAA and SOC 2 Type II compliance, that integration layer carries its own significant complexity. SoFaaS™ handles that complexity for you, with pre-built connectors, a unified API, and built-in compliance infrastructure so your developers can focus on building rather than configuring. Start exploring how SoFaaS can accelerate your healthcare integration and get your SMART on FHIR app live in days.
The Future of Patient Logistics
Exploring the future of all things related to patient logistics, technology and how AI is going to re-shape the way we deliver care.
Thank you! Your submission has been received!
Oops! Something went wrong while submitting the form.